Installation
Please visit the official documentation page
but do not forget to add the permission problem:
|
1 2 |
sudo usermod -a -G docker $USER newgrp docker # Apply the group change without logging out |
Docker image
If the image doesn’t exist it will pull it from hub.docker.com
Basically, it runs the pull command beforehand:
|
1 |
docker pull <image_name:tag_name> |
for instance, to install Ubuntu 20.04
|
1 |
docker pull ubuntu:20.04 |
to check the version, just run:
|
1 |
lsb_release -a |
To see available images on your machine:
|
1 |
docker images |
or
|
1 |
docker image ls |
You can search directly from the terminal for images:
|
1 |
docker search <image_name> |
And you can type exit to leave.
To remove all dangling images:
|
1 |
docker image prune |
to remove all unused images, not just dangling ones
|
1 |
docker image prune -a |
Docker container
The run command will start a container from a given image:
|
1 |
docker run --name <name_for_container> -it <image_name:tag_name> bash |
-i: means interactive
-t: means tty
If you don’t provide a container name with the --name, then the daemon generates a random string name for your container, such as “loving_tereshkova”.
To spin up a container from an image and delete it automatically after exit:
|
1 |
docker run -it --rm <image_name:tag_name> bash |
you can give your container a name and join it via another terminal
|
1 |
docker exec -it <container_name> bash |
or you can resume it again and reuse it:
|
1 |
docker start -i <container_name> |
To see the running containers:
|
1 |
docker ps -a |
To see all running containers:
|
1 |
docker ps |
The following command has the same output as docker ps, but it is a more updated command to it’s better to use this one
|
1 |
docker container ls |
To list all containers (default shows just running)
|
1 |
docker container ls -a |
To terminate a container:
|
1 2 |
docker kill docker stop |
“kill” will terminate the container immediately.
Next time you want to run your container, you can use the name you gave to it :
|
1 2 3 |
# find the name of the stopped docker first with: docker container ls -a docker start -i <container_name> |
Now, if we install some packages inside our container, we can use docker diff to the changes we made to our container:
|
1 |
docker diff <container_id> |
to find where the images and dockers are stored:
|
1 |
docker info |
which on Ubuntu they are under:
|
1 |
Docker Root Dir: /var/lib/docker |
to remove a container:
|
1 2 |
docker rm <container_id> docker rm <given-name> |
Remove all containers:
|
1 |
docker rm $(docker ps -a) |
To remove all the unused containers at once:
|
1 |
docker container prune |
to remove an image:
|
1 |
docker rmi <your_image_tag_name> |
if you have a container that has been spun from an image, you need to delete it before removing an image, or you can use the force option:
|
1 |
docker rmi -f <your_image_tag_name> |
to list dangling images:
|
1 |
docker images -f dangling=true |
to remove dangling images:
|
1 |
docker rmi $(docker images -f dangling=true -q) |
Creating Images
We can use the following to build an image from our container and make a new image:
- commit
- build
1. Creating images from an existing container changes
commit will create an image from your container:
|
1 |
docker commit <container_id> <image_name> |
2. Build an image
What build does is, pulling images, running an intermediate container from them, run your commands on them, and finally commit that and build an image, so it is basically an automated commit.
Example 1
First, search in the hub.docker.com for an image i.e. “Ubuntu” to find the right name then create a file and rename it “Dockerfile” and add the following to that:
|
1 2 3 4 5 6 7 8 9 10 11 12 13 14 15 16 17 18 19 |
# ubunutu is the base image FROM ubuntu:20.04 # this is for making the installation non interactive ENV DEBIAN_FRONTEND=noninteractive # this is for timezone config ENV TZ=Europe/Berlin RUN ln -snf /usr/share/zoneinfo/$TZ /etc/localtime && echo $TZ > /etc/timezone RUN apt-get update #-y is for accepting yes when the system asked us for installing the package RUN apt-get install -y cmake RUN git clone https://github.com/gflags/gflags RUN mkdir -p gflags/build && cd gflags/build WORKDIR "gflags/build" RUN cmake ../ && make -j8 all install |
Now you can build your custom image:
|
1 |
docker build -t <my_image_tag_name> <path_to_Dockerfile> |
The default file that docker looks for is Dockerfile without any extension. After building your image you can a container from that with:
|
1 |
docker run --name <container_name> -it <image_name> |
Transferring Files From/Into Containers
|
1 2 |
docker cp <OPTIONS> <CONTAINER:SRC_PATH> <DEST_PATH_ON_HOST> docker cp <OPTIONS> <SRC_PATH_ON_HOST> <CONTAINER:DEST_PATH> |
We can also use volumes.
Volume
If you delete your container, your data stored on the container will be lost. You can use volume to store your data outside of containers. Volumes are the preferred mechanism for persisting data generated by and used by Docker containers.
We can map a directory on the host machine into a directory into the docker. This is called volume. If you delete the container, the volume won’t be deleted. To get information about the command, just run:
|
1 |
docker volume |
to get a list of existing volumes:
|
1 |
docker volume ls |
to display detailed information on a volume
|
1 |
docker volume inspect <volume-name> |
attach a volume to a container
|
1 |
docker run --name <containe-name> -v <path-on-host>:<path-in-the-container> -v <path2-host>:<path2-container> -it <image-name:tag> bash |
Cleaning build cache
|
1 |
docker builder prune |
Developing docker with GUI (X Window System Forwarding)
Allow the Docker container to access your X11 server using xhost:
|
1 |
xhost +local:docker |
create our container:
|
1 |
docker run -v <path-on-host>:<path-in-the-container> -v /tmp/.X11-unix:/tmp/.X11-unix --name <container-name> -e DISPLAY=$DISPLAY -e QT_X11_NO_MITSHM=1 --network=host --privileged -it <image-name:tag> bash |
In this command:
-v /tmp/.X11-unix:/tmp/.X11-unix: Allows the container to use the host’s X11 server for GUI applications.-e DISPLAY=$DISPLAY: Sets theDISPLAYenvironment variable inside the container to use the host’s display.--network=host: Uses the host’s network stack inside the container. This is useful for applications that require access to the host’s network.
Now inside the container, install the xeyes
|
1 |
apt update && apt install x11-apps -y |
Now, if run xeyes on the docker, it will be forwarded to the host:
Docker Entry point
Docker’s entry point specifies the executable to be run when a container starts. It is often used in conjunction with the CMD instruction to set a default command and its arguments. The main difference between CENTRYPOINTand CMDis that ENTRYPOINTconfigures a container to run as an executable, whereas CMD sets default commands and arguments that can be overwritten from the command line when the container is run.
Understanding ENTRYPOINT
– Executable Form: This is the preferred form for ENTRYPOINT because it allows the entry point to receive arguments from the CMD instruction or from the command line when running the container. It’s defined as a JSON array with the executable at the first position and arguments in the subsequent positions: ENTRYPOINT ["executable", "param1", "param2"] .
– Shell Form: This form runs the entry point command within a shell, which allows you to use shell processing on the given command. It’s defined as: command param1 param2 . However, it doesn’t allow the appending of additional arguments from the CMD instruction or the command line.
Example with ENTRYPOINT
Let’s say you have a Python application that you want to run inside a Docker container. The application is a simple script that prints a message, and you want to be able to pass the message as an argument when running the container.
1. Python Script (app.py):
|
1 2 3 |
import sys message = sys.argv[1] if len(sys.argv) > 1 else "Hello, World!" print(message) |
2. Dockerfile:
|
1 2 3 4 5 6 7 8 9 10 11 |
# Use an official Python runtime as a parent image FROM python:3.8-slim # Set the working directory in the container WORKDIR /usr/src/app # Copy the current directory contents into the container at /usr/src/app COPY . . # Set the entry point to Python interpreter ENTRYPOINT ["python", "app.py"] |
3. Building and Running the Docker Container:
– To build the Docker image, run: docker build -t my-python-app .
– To run the container with the default message, simply execute: docker run my-python-app
– To run the container with a custom message, append the message at the end of the run command: docker run my-python-app "Hello from Docker!"
In this example, ENTRYPOINT is set to ["python", "app.py"], making the Python interpreter with app.py as its argument the default executable for the container. When you run the container without any additional arguments, it prints “Hello, World!”. If you provide an argument, like "Hello from Docker!", it overrides the default CMD (if it were specified) but gets passed to the ENTRYPOINT as additional arguments, allowing the script to print the custom message.
Developing your project on Docker
I have used VS Code for that purpose, first install the following extensions:
- Remote Containers
- Remote explorer
- Docker Explorer
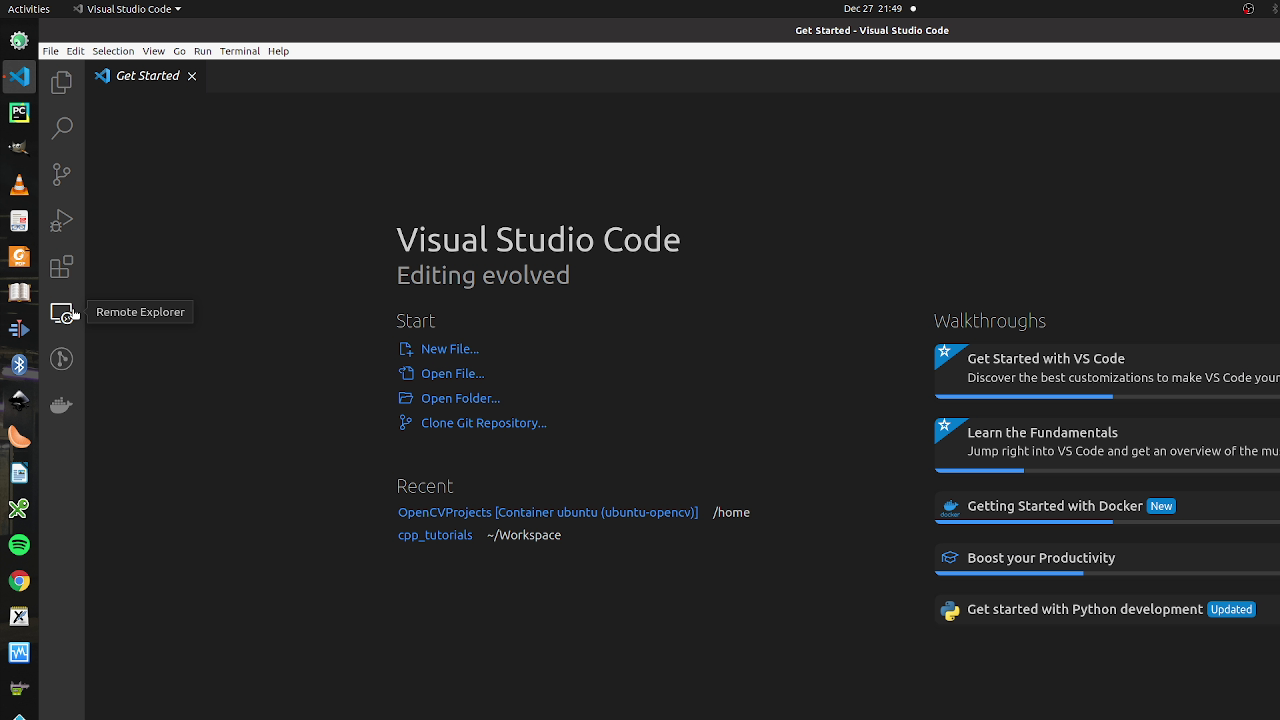
Now run your container and in the VS Code click on the remote explorer:
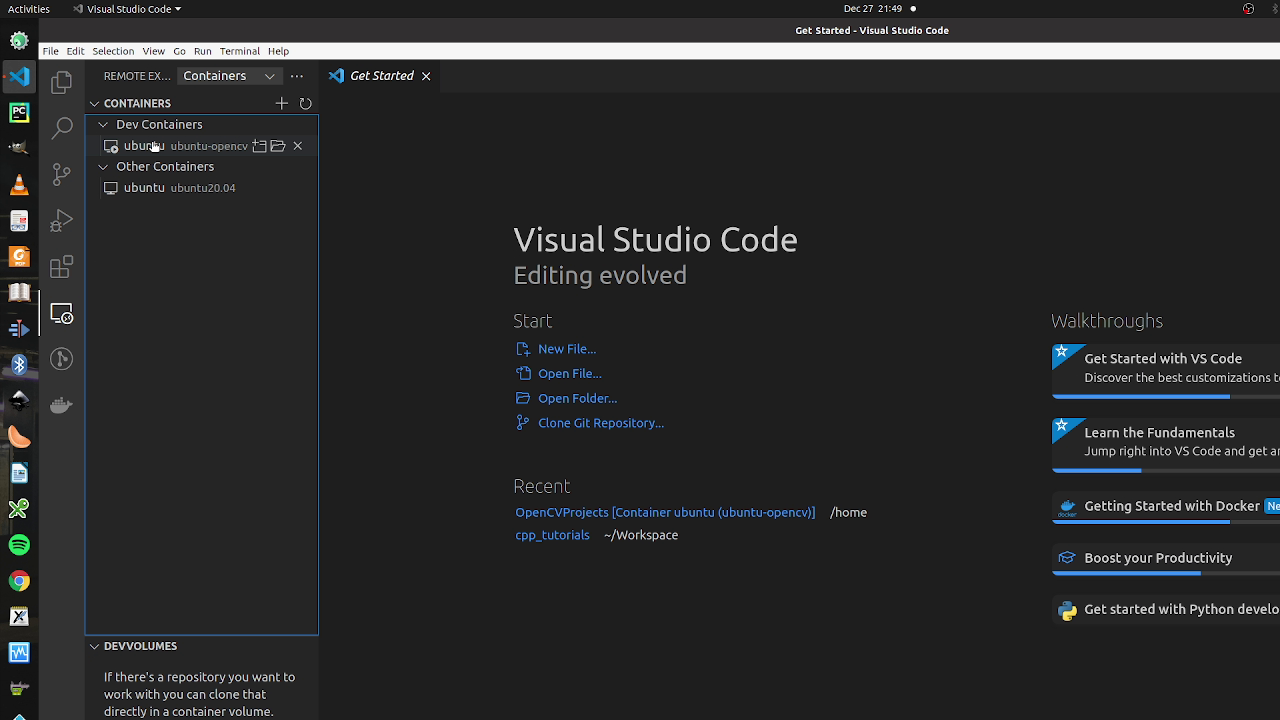
Now right click on the running container and click on attach to container:
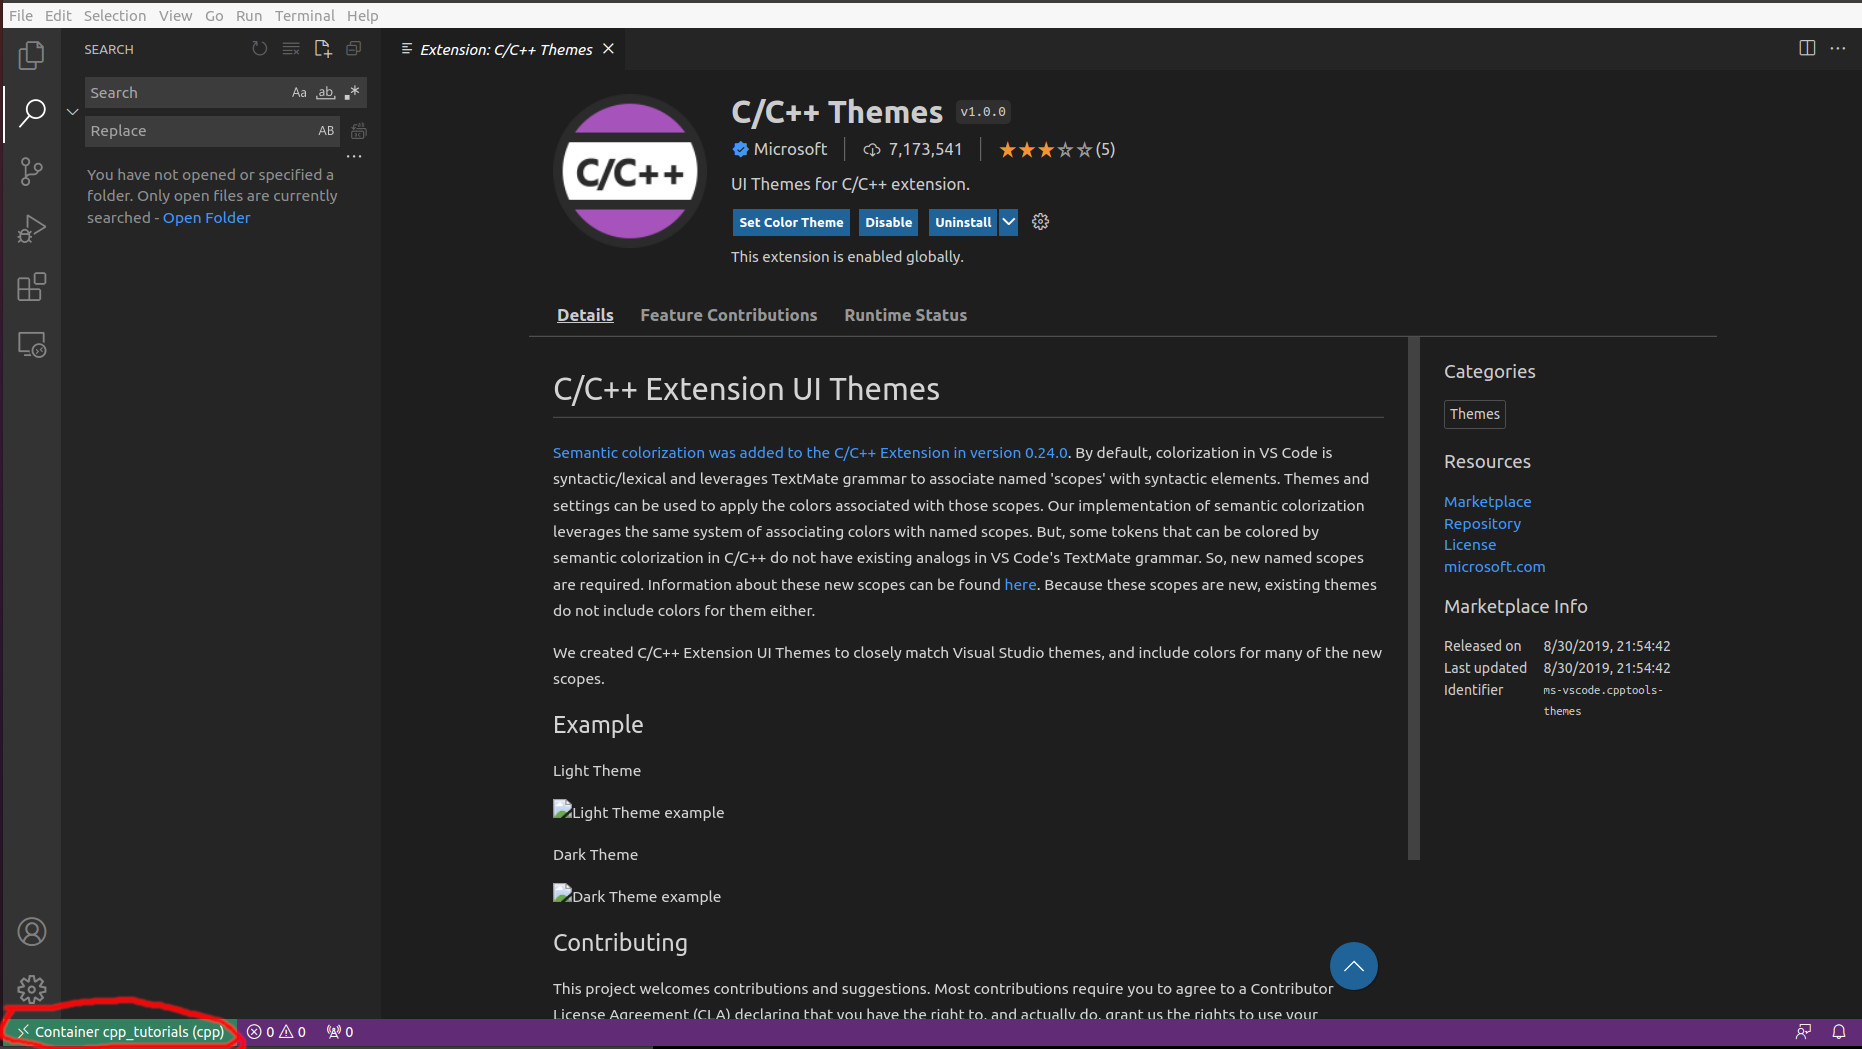
if this is the first time that you are doing this, it will initialize a new instance of VSCode, now in the new VSCode, at the bottom, you can see the connected container:
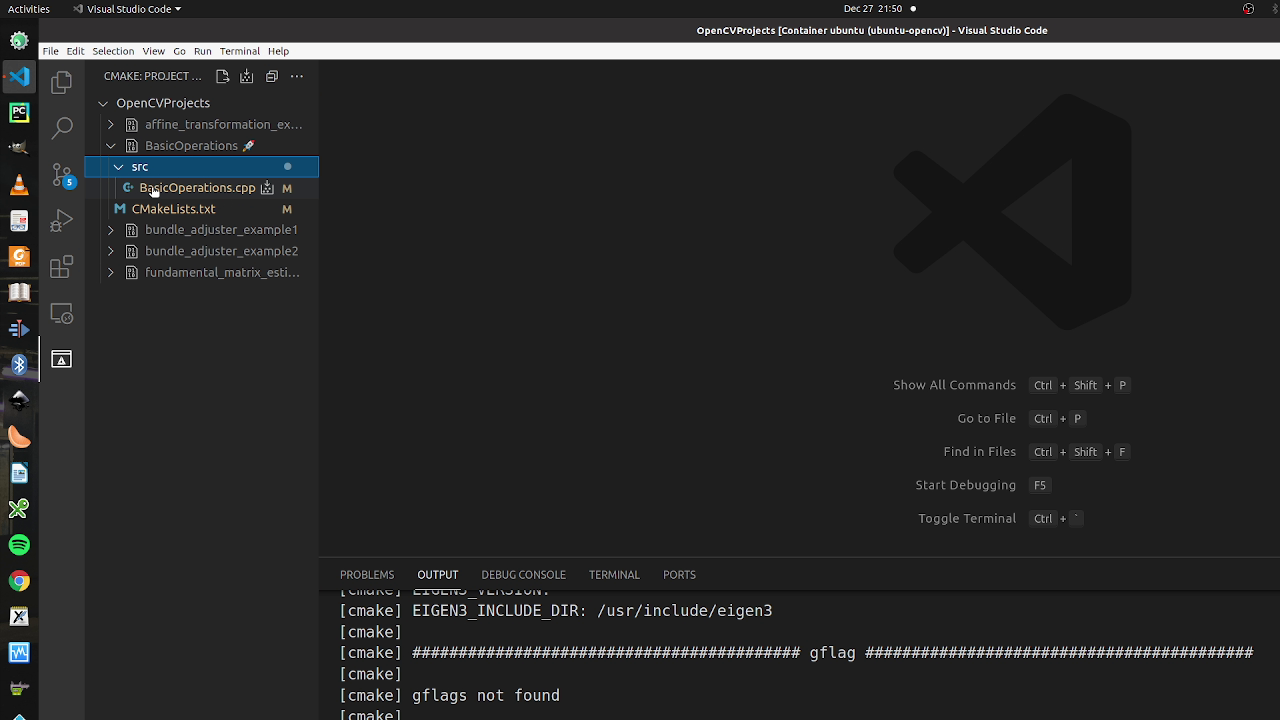
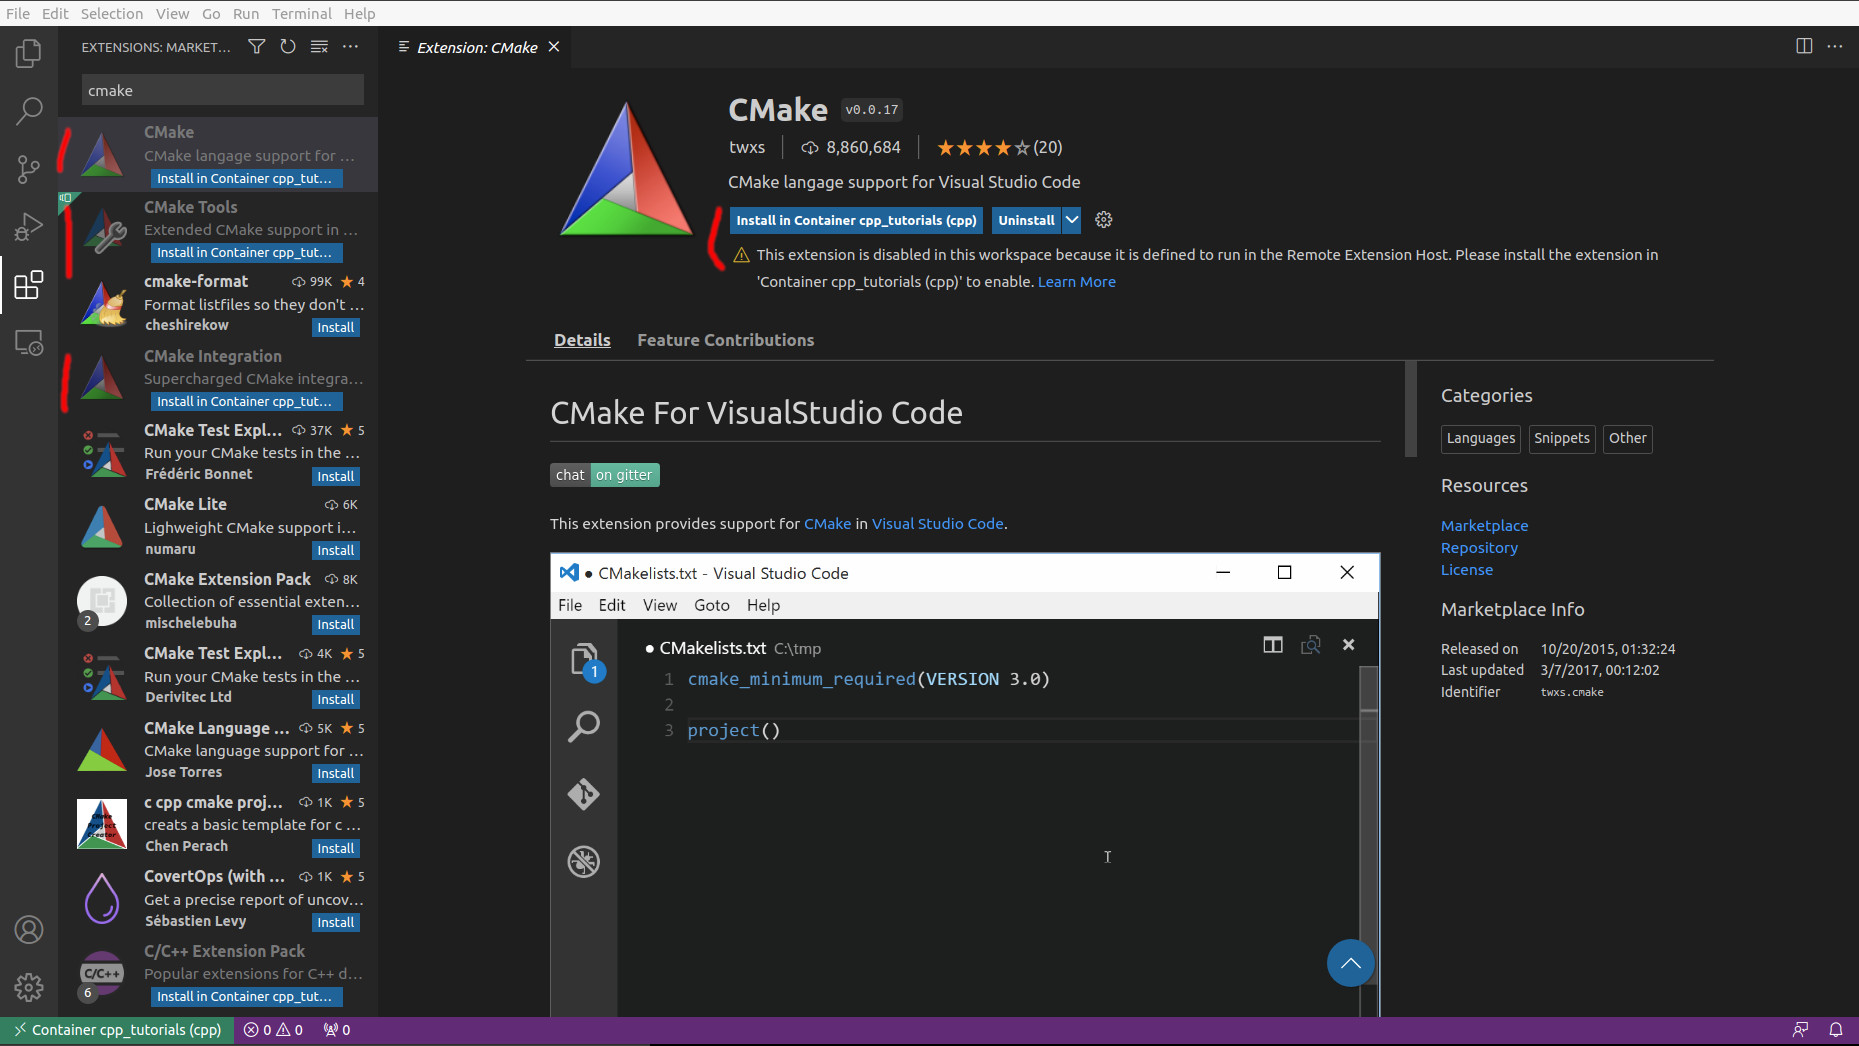
Now you should reinstall your extension such as C/C++ CMake, CMake Tools, CMake Integration in the container:
Now press ctrl+shit+p to open the pallet windows, and type: cmconf
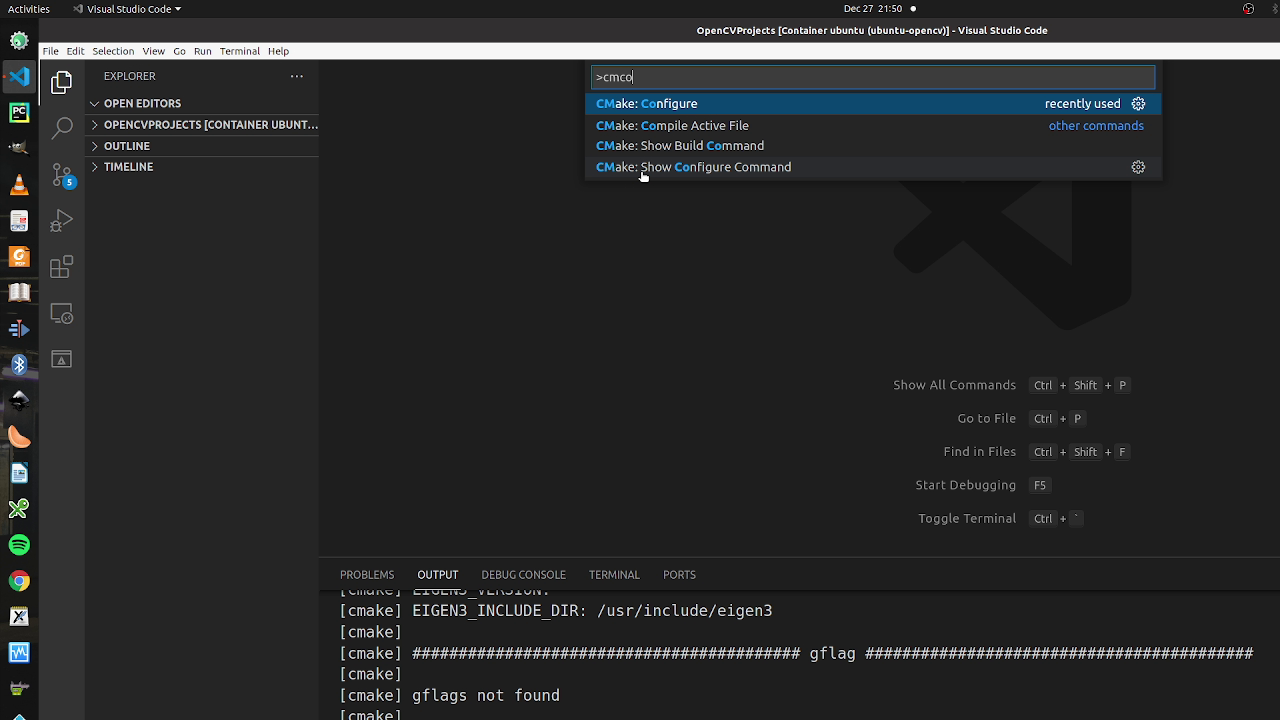
and now by clicking on the CMake icon on the left, we build/ debug our applications